🌌 Add Custom Model
Before diving in, make sure your resource pack host is fully set up. Remember - every model edit requires a resource pack update to take effect. Otherwise, you won't see the changes right away when you do /ce reload all.
Preparation
What is Resource location
Resource locations are a way to declare and specify game objects in Minecraft, which can identify built-in and user-defined objects without potential ambiguity or conflicts.
When setting up item IDs, model paths, or texture paths, you'll need to follow these naming rules: https://minecraft.wiki/w/Resource_location#Legal_characters
Let's do a quick test! Which of these five resource locations are actually valid?
MyFirst:golden_swordminecraft:steel furnaceabcd-efgh:1122.3344craftengine:happy$craftingtest:tutorial_book
- ❌️ uppercase letters aren't allowed
- ❌️ spaces are not allowed
- ✔️
- ❌️
$is not a valid letter - ✔️
What is Model?
Models are three-dimensional shapes used in Minecraft that are used to display objects encountered in the game.
Whether it's blocks or items, they all need a model. Even if something looks like just a simple texture, it still requires a basic model. These model files all end with .json, and you can open/edit most of them in BlockBench.
Here's a quick file structure to show where models should go:
When making resource packs, I highly recommend following Minecraft's structure:
- Put item models in
/models/item/ - Place block models in
/models/block/
Keeping this organization makes your pack more standardized and easier to work with!
To avoid conflicts with Minecraft's default assets, you have two great options:
- Create subfolders like /models/item/custom/
- Or better yet, use your own namespace (e.g. mypack:item/sword)
What is Texture / Atlas?
Models define shapes, but textures bring color! Textures refer to image files specifically in PNG format (with the .png file extension). The use of alternative image formats such as JPG/JPEG or GIF is not permitted.
Here's where they go:
Texture paths are stricter than model paths!
While models might work even if you misplace their JSON files (e.g., outside /item/ or /block/), textures must be in the correct folder due to Minecraft’s texture atlas system.
Let me simplify how textures work in Minecraft:
Minecraft combines multiple textures into one giant image (called an atlas) to boost performance. However, not all textures are model textures (e.g., pumpkin head masks, rain/snow environment textures, etc.). Therefore, an atlas file must be used to define which textures are eligible for loading.
By default, Minecraft uses the following texture atlases (minecraft/atlases/blocks.json):
{
    "sources": [
        { "type": "directory", "source": "block", "prefix": "block/" },
        { "type": "directory", "source": "item", "prefix": "item/" },
        ...more
    ]
}
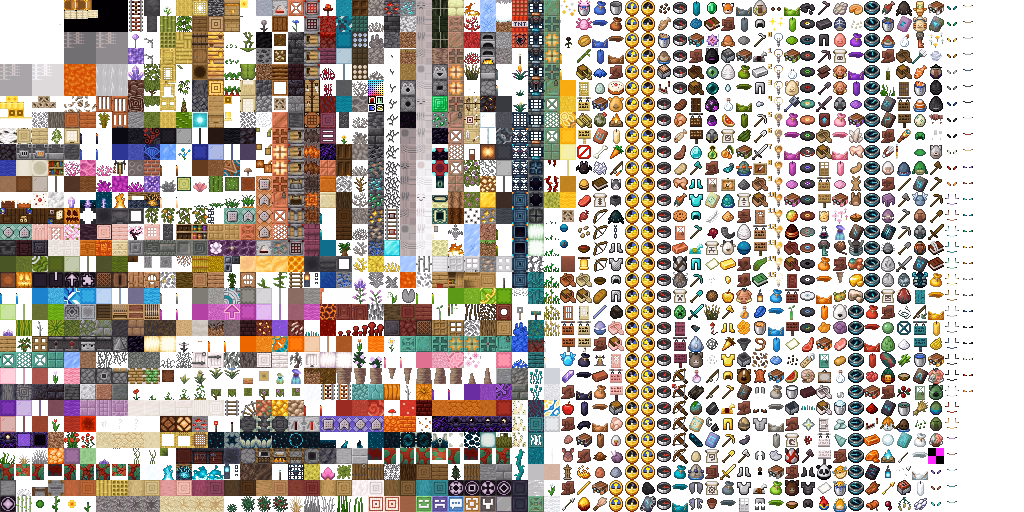
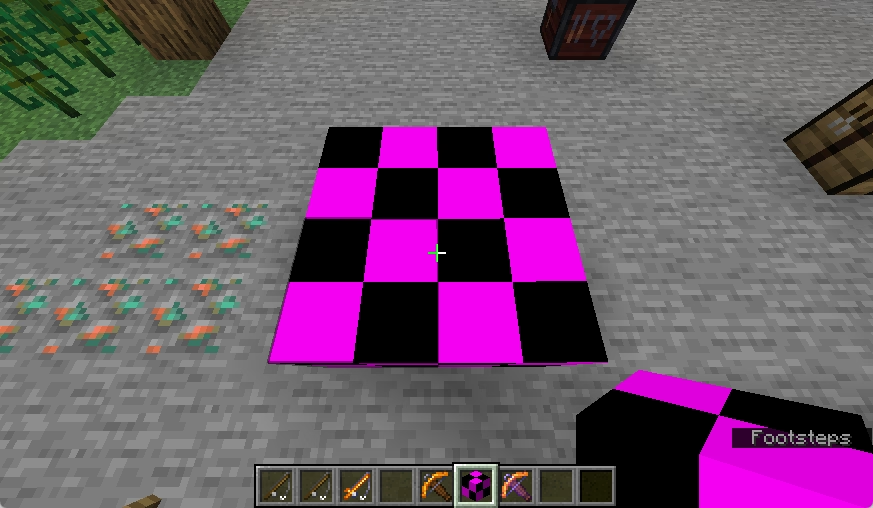
This is why Minecraft can only load textures located within the block and item directories by default. If you attempt to reference textures from an unsupported path (e.g., textures/custom), the engine will fail to load them, resulting in the purple-and-black checkered pattern.
To create an atlas path, you simply need to add a file to your resource pack at the following path: resourcepack/assets/minecraft/atlases/blocks.json. Below is a simple example that adds the custom path to the atlas:
{
    "sources": [
        { "type": "directory", "source": "custom", "prefix": "custom/" }
    ]
}
Model Texture Size Requirements for Minecraft
For model textures only, the width and height must be powers of 2 (e.g., 16, 32, 64, 128) to ensure correct rendering. This restriction does not apply to font textures (e.g., rank.png, GUI elements, HUD icons, etc.), which can use arbitrary dimensions.
Valid Examples:
✅ 16×16 (Vanilla default)
✅ 32×32 (Common for HD textures)
✅ 64×64, 64×128 (Higher-resolution packs)
Invalid Examples:
❌ 7×7, 13×13, 19×19 (Non-power-of-2 dimensions)
❌ 17×32 (Mixed valid/invalid dimensions)
Never place font/GUI textures (e.g., rank.png, HUD elements) in the same directory as model textures (e.g., block/, item/). Even if these textures are not directly used in models, Minecraft's texture atlas system will automatically include them when generating combined sprite sheets. This can lead to unintended visual degradation(mipmap-level):
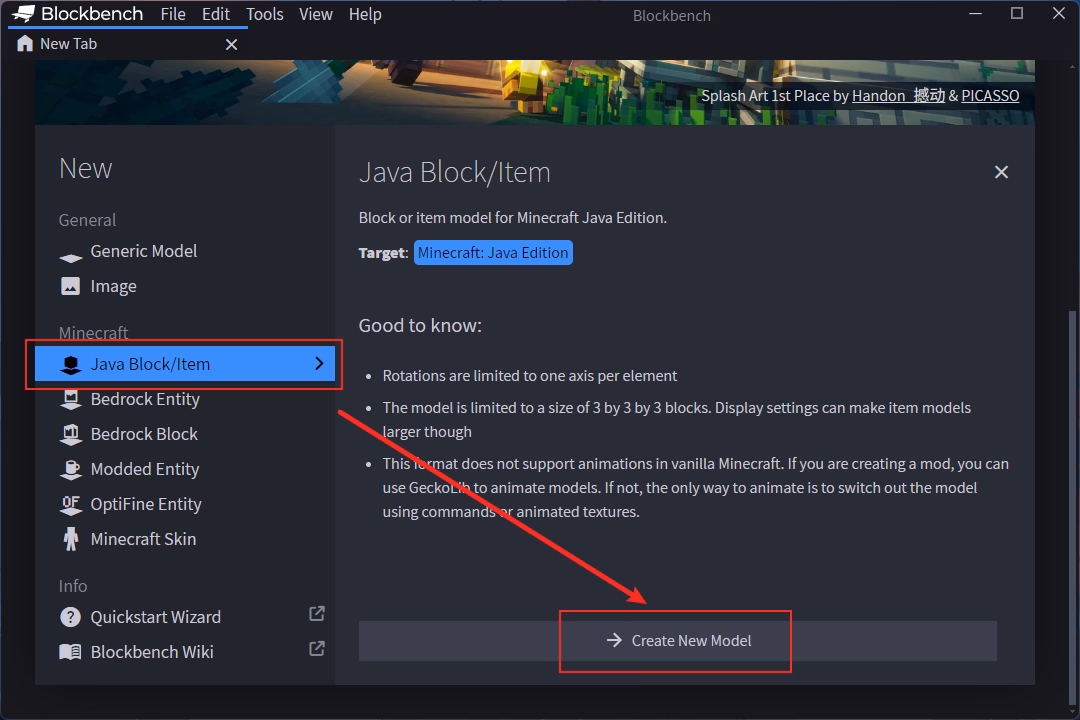
Create Model File
Let's now create the first model file! You can create models either through BlockBench or by configuring them in CraftEngine. I'll divide this section into two separate tutorials. I highly recommend trying both approaches to gain a deeper understanding of how the model system works.
Download Tutorial Sword TexturePlace the downloaded PNG image into the folder structure shown below. Then, we'll proceed to create the model.
Create Model with BlockBench
As a server developer, you don't need advanced modeling skills. You only need to master basic model editing and importing! Treat the following tutorial as a playground and experiment freely.

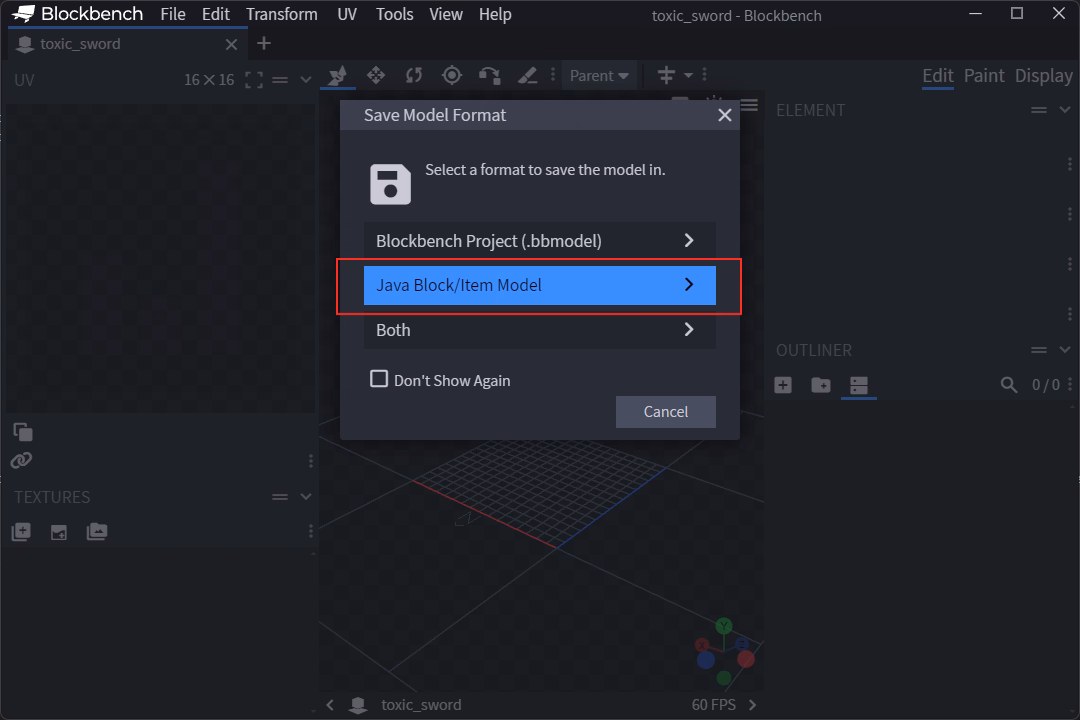
First, save the model using Ctrl+S to your resource pack folder before proceeding with any edits. In this tutorial, I saved the JSON file to:
/resources/tutorial/resourcepack/assets/tutorial/models/item/
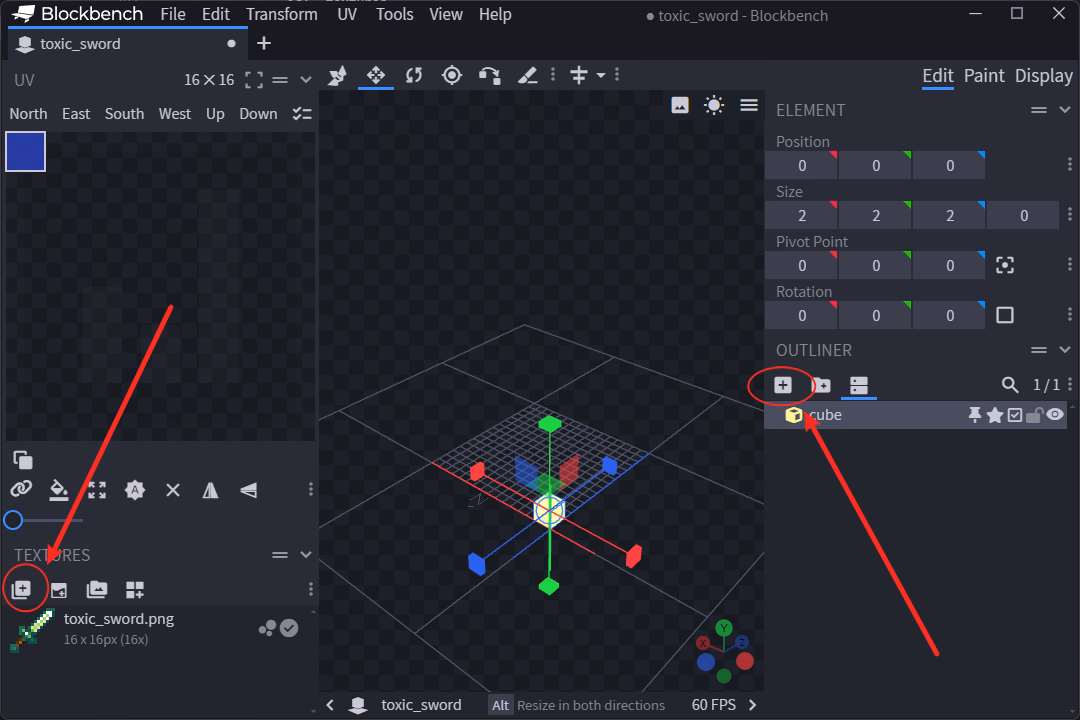
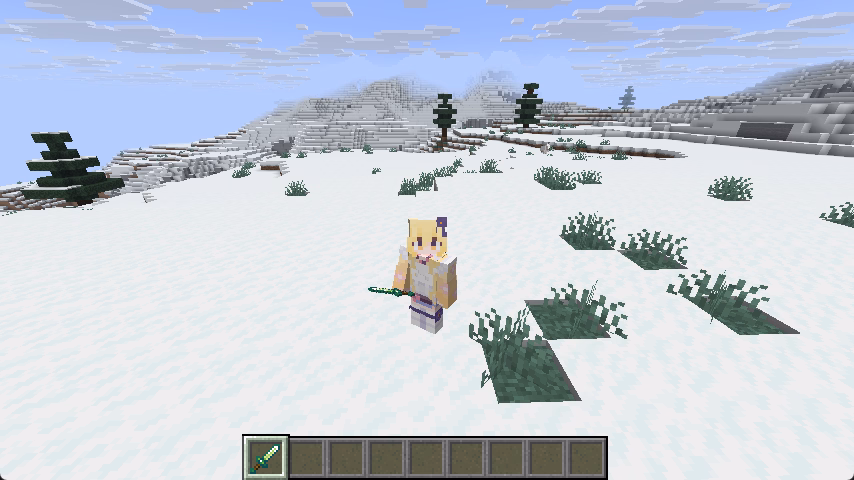
Create a basic cube and apply the toxic_sword texture resourcepack/assets/tutorial/textures/item/toxic_sword.png. Experiment with simple adjustments—treat this as a casual practice session. In the following example, I created an unconventional sword-shaped block. While unusual, the key takeaway is that this represents a fully custom model.
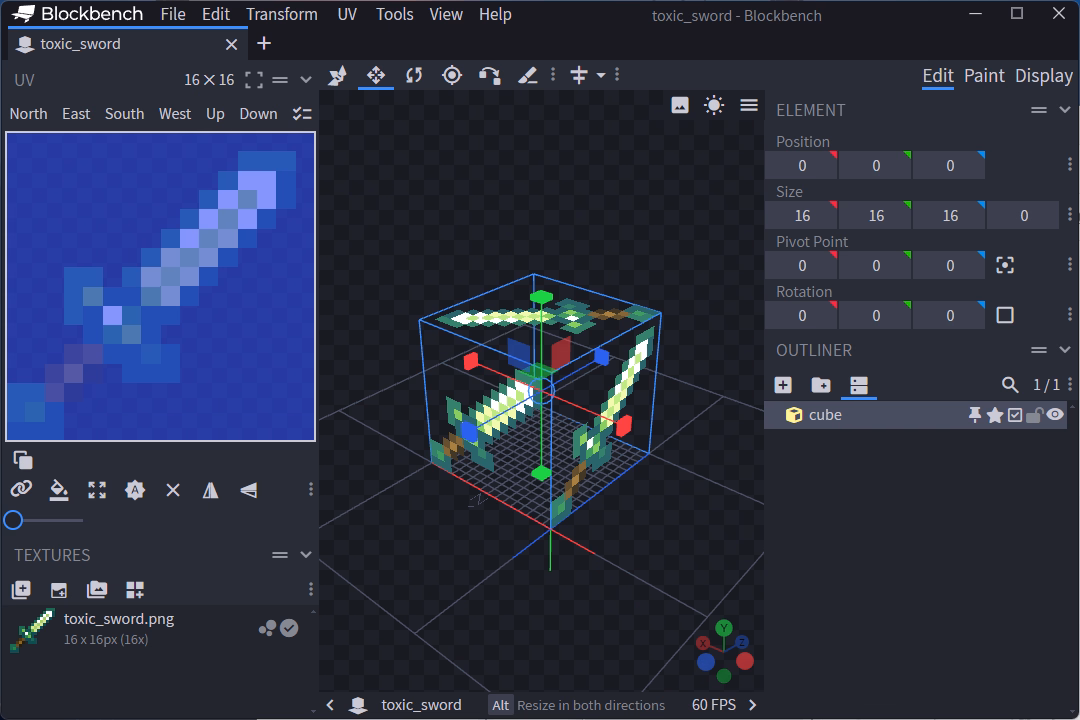
Now let's open the model JSON file we just created using a professional text editor. Your JSON structure should generally match mine.
Always save model JSON files within a complete resource pack structure. Otherwise, BlockBench cannot infer the correct resource pack hierarchy, resulting in texture paths that Minecraft cannot resolve. If your textures entry differs significantly from mine, this is likely the cause.
{
  "format_version": "1.21.6",
  "credit": "Made with Blockbench",
  "textures": {
    "0": "tutorial:item/toxic_sword",
    "particle": "tutorial:item/toxic_sword" // refers to visual effects for block destruction, eating, etc.
  },
  "elements": [
    {
      "from": [0, 0, 0],
      "to": [16, 16, 16],
      "faces": {
        "north": {"uv": [0, 0, 16, 16], "texture": "#0"},
        "east": {"uv": [0, 0, 16, 16], "texture": "#0"},
        "south": {"uv": [0, 0, 16, 16], "texture": "#0"},
        "west": {"uv": [0, 0, 16, 16], "texture": "#0"},
        "up": {"uv": [0, 0, 16, 16], "texture": "#0"},
        "down": {"uv": [0, 0, 16, 16], "texture": "#0"}
      }
    }
  ]
}
When using third-party resource packs, modifying model texture paths may cause missing texture errors. In such cases, open the model in BlockBench and reconfigure the texture paths. Otherwise, the model will appear as a purple-black error block.
Alternatively, you can directly modify the textures entry in the JSON file using a text editor. Note that resource locations automatically ignore prefixes like models & textures. Here, tutorial:item/toxic_sword corresponds to the actual texture path: assets/tutorial/textures/item/toxic_sword.png.
Now let's return to CraftEngine's configuration and assign our newly created model to the sword item. To ensure consistency with the expected results, I've uploaded my configuration file here for your reference. Please cross-check if your result differs.
items:
  tutorial:toxic_sword:
    material: diamond_sword
    data:
      item_name: "<#3CB371>Toxic Sword"
    model:
      type: minecraft:model # Don't focus too much on the type here as we'll explain it in detail later.
      path: tutorial:item/toxic_sword

Don't forget to run /ce reload all to apply the resource pack changes.
CustomModelData is a data component that enables unique model variations for items sharing the same base material. For items with identical base materials, you must assign distinct CustomModelData values to differentiate their models. Example:
items:
  tutorial:toxic_sword:
    material: diamond_sword
    custom_model_data: 1000
  tutorial:flame_sword:
    material: diamond_sword
    custom_model_data: 1001
However, this restriction does not apply to items with different base materials. For example:
items:
  tutorial:toxic_sword:
    material: diamond_sword
    custom_model_data: 1000
  tutorial:flame_sword:
    material: wooden_sword
    custom_model_data: 1000
ItemModel, introduced in 1.21.2, is a data component with better rendering efficiency than CustomModelData, reducing client-side performance overhead. Normally, you don’t need to manually specify the model path (item_model), as the plugin auto-generates it.
Generate Model with CraftEngine
Now let's try CraftEngine's model generation feature. Note: If you've completed the previous BlockBench tutorial, delete the model JSON file created earlier. As the title "Generate" indicates, we won't be using BlockBench-created models for this section.
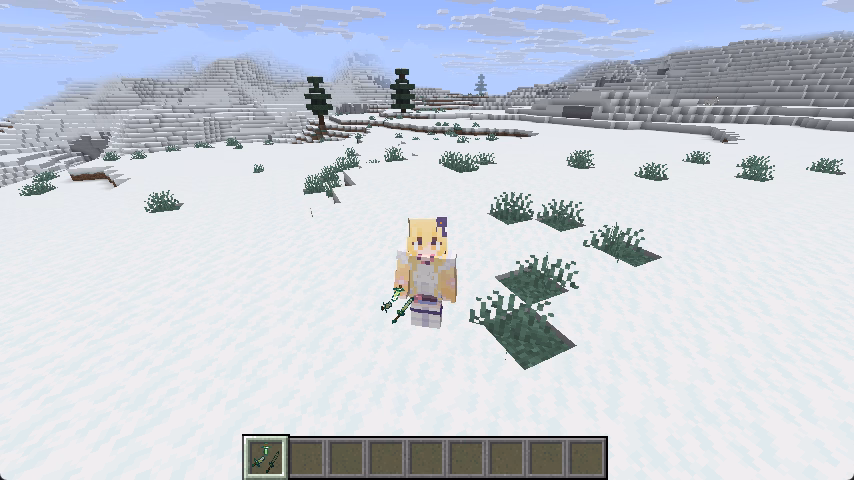
items:tutorial:toxic_sword:material: diamond_sworddata:item_name: "<#3CB371>Toxic Sword"model:path: tutorial:item/toxic_sword+ generation:+ parent: minecraft:item/handheld+ textures:+ layer0: tutorial:item/toxic_sword
When using the generation configuration within a path-defined section, the plugin switches from read mode to write mode. This will generate the corresponding JSON model file at the specified path.
Let me explain the purpose of each parameter and where to obtain them:
- 👨🦱 parent
- 🖼️ textures
- 🎨 display
- 💡 gui_light
Loads a different model from the given path, in form of a resource location
The parent field can not only reference the default models provided by vanilla Minecraft but can also point to your custom models. You can view all available Minecraft models on this website
In Minecraft, most models (items, tools, and even blocks) utilize parent-based generation rather than independent modeling. You'll likely use this model generation approach in at least 80% of your configurations.
Think of a parent model as a prebuilt 3D template — you only need to supply texture parameters to make it functional.
generation:
  parent: minecraft:item/handheld
  textures:
    layer0: tutorial:item/toxic_sword

generation:
  parent: minecraft:item/generated
  textures:
    layer0: tutorial:item/toxic_sword
generation:
  parent: minecraft:block/cube_all
  textures:
    all: tutorial:item/toxic_sword
You may wonder why the first two models use layer0 while the third uses all.
To explore further, press 🖼️ textures to continue the tutorial.
Holds the textures of the model, in form of a resource location or can be another texture variable.
To determine the exact texture parameters:
- Inspect the parent model’s JSON structure.
- If the parent itself inherits another model (e.g., minecraft:item/generated extends a base template), recursively check all upstream textures.
All vanilla Minecraft models are available on GitHub.
Let's examine this example to understand texture overriding. For this scenario, you have two approaches to assign textures:
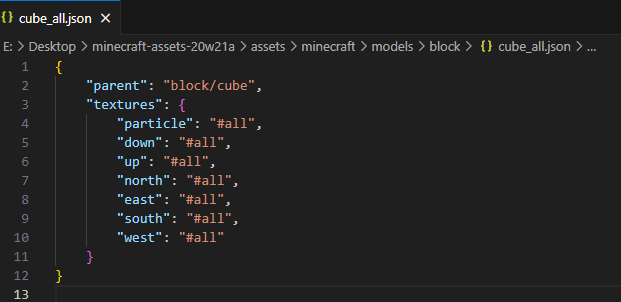
Use cube_all’s shorthand
generation:
  parent: "minecraft:block/cube_all"
  textures:
    "all": "minecraft:block/custom/block_texture"
Override cube (parent of cube_all)
This is actually an inappropriate example. A better approach would be to directly set the parent as cube rather than cube_all.
generation:
  parent: "minecraft:block/cube_all"
  textures:
    "particle": "minecraft:block/custom/block_particle"
    "down": "minecraft:block/custom/block_down"
    "up": "minecraft:block/custom/block_up"
    "north": "minecraft:block/custom/block_north"
    "east": "minecraft:block/custom/block_east"
    "south": "minecraft:block/custom/block_south"
    "west": "minecraft:block/custom/block_west"
Holds the different places where item models are displayed.
- rotation: Specifies the rotation of the model according to the scheme [x, y, z].
- translation: Specifies the position of the model according to the scheme [x, y, z]. If the value is greater than 80, it is displayed as 80. If the value is less than -80, it is displayed as -80.
- scale: Specifies the scale of the model according to the scheme [x, y, z]. If the value is greater than 4, it is displayed as 4.
Available values: thirdperson_righthand, thirdperson_lefthand, firstperson_righthand, firstperson_lefthand, gui, head, ground, fixed, or on_shelf.
This configuration is rarely used, as in most cases you can more intuitively adjust the model display mode directly in Blockbench.
items:
  default:big_apple:
    material: apple
    model:
      type: minecraft:model
      path: "minecraft:item/custom/big_apple"
      generation:
        parent: "minecraft:item/apple" # inherits apple's model
        # displays a big apple in gui
        display:
          gui:
            scale: 2,2,2
Can be front or side. If set to side, the model is rendered like a block. If set to front, model is shaded like a flat item. Defaults to side.
![]()
items:
  default:gui_head_size_1:
    material: player_head
    model:
      type: minecraft:special
      # The model here is a parameter required for minecraft:special models
      # and is unrelated to the outer model. We will cover special models in detail in future tutorials.
      model:
        type: minecraft:player_head
      path: minecraft:item/custom/gui_head_size_1
      generation:
        parent: minecraft:item/template_skull
        gui_light: front
        display:
          gui:
            translation: 0,8,0
            scale: 2,2,2
Debugging
If your model appears as a purple-black cube or fails to render properly, first check your server console—CraftEngine will log most potential errors there. Alternatively, inspect the client logs to diagnose resource pack loading issues.